W2A Setup: WooCommerce to Attio Integration Guide
1. Installation
Create your Attio access token
In Attio, go to Account settings → Developers → New access token, then grant exactly these permissions:
- User ManagementRead
- RecordsRead-write
- Object ConfigurationRead-write
- NotesRead-write
- TasksRead-write
Every other permission can stay Disabled.
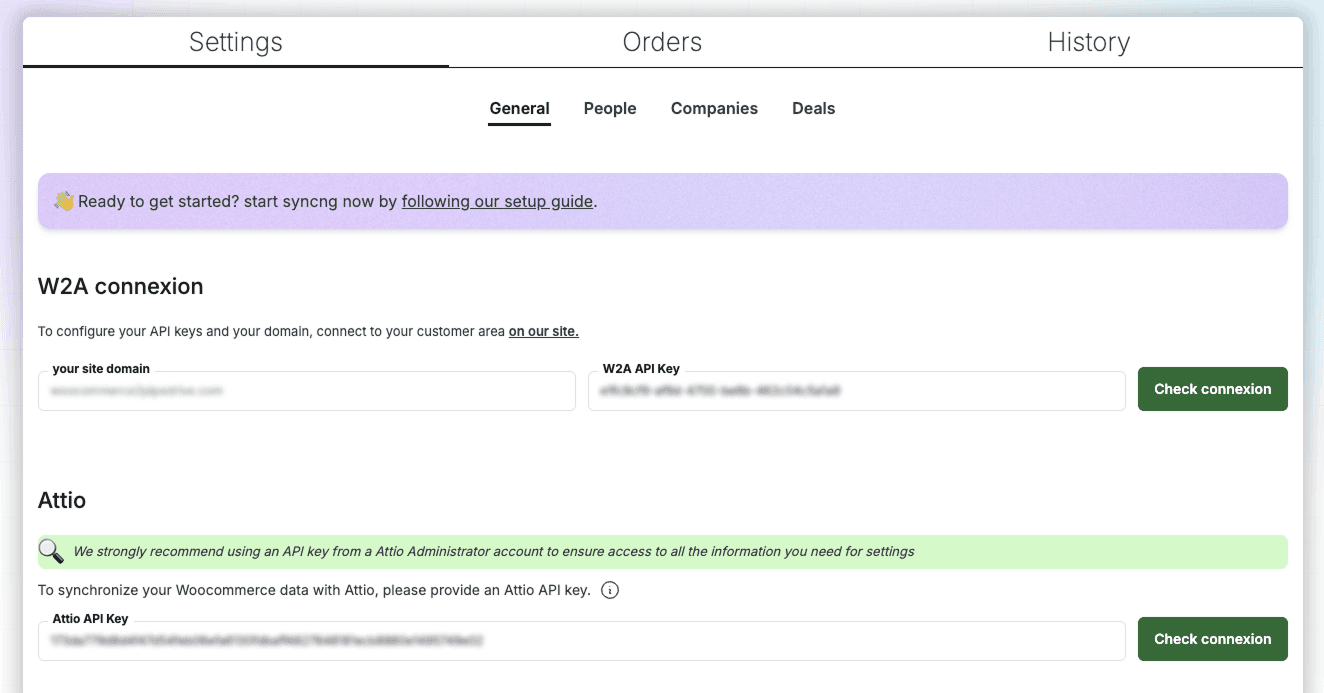
The plugin is live! Start by installing our WooCommerce to Attio integration plugin — you can download it from the WordPress plugin directory. Then grab your W2A API key from your dashboard.
Next, head to Attio and create an access token from Account settings → Developers → New access token. Set the permissions shown above — these are the scopes W2A needs to read your workspace and sync WooCommerce data into Attio.
Finally, paste both the W2A API key and your Attio access token into the plugin, then load the default settings for a ready-to-go configuration to start syncing right away.
2. Configuring Events
Fired when a cart is abandoned (only if the customer is logged in).
Fired after a user logs in.
Triggered after a new user registration.
Fired after a user is updated.
Fired when a new order is created.
Fired when an order is updated.
Fired when an order is placed on hold.
Fired when an order is awaiting payment (pending).
Fired when an order is being processed.
Fired when an order is successfully completed.
Fired when an order is refunded.
Fired when an order is canceled.
Fired when an order fails.
The settings are organized with a tab per Attio object — People, Companies, and Deals. For each one, you choose the WooCommerce events (hooks) that should trigger a sync to Attio.
Events are fired by your customers' actions on your store. Enable the ones that matter to you:
- New user registration or account update
- New order, order status change, or failed payment
- Abandoned cart
Some events aren't available for every object (e.g. "User register" doesn't apply to Deals). Each event is fully customizable — you decide exactly which Attio attributes are sent when it fires.
3. Customizing Attributes and Conditions
For each event, pick the Attio attributes you want to populate and compose their value from your WooCommerce and Wordpress data — billing name, email, custom meta, or free text.
- Fallback values — sent when a variable is missing, so the attribute is never left empty.
- Conditions — only send if a value exists, or only set an attribute on Attio when it's still empty (never overwrite).
- De-duplication — match on an attribute (e.g. email) to link a WooCommerce account to an existing Attio person instead of creating a duplicate.
4. Running a Full Sync, Monitoring History
Once your settings are configured, run a full synchronization to send all your existing users and orders to Attio, based on the parameters defined in the previous steps.
Behind the scenes, W2A searches Attio first to avoid duplicates based on your configuration, then creates or updates the matching record and links it to the WooCommerce entity.
- One click to backfill your entire history into Attio.
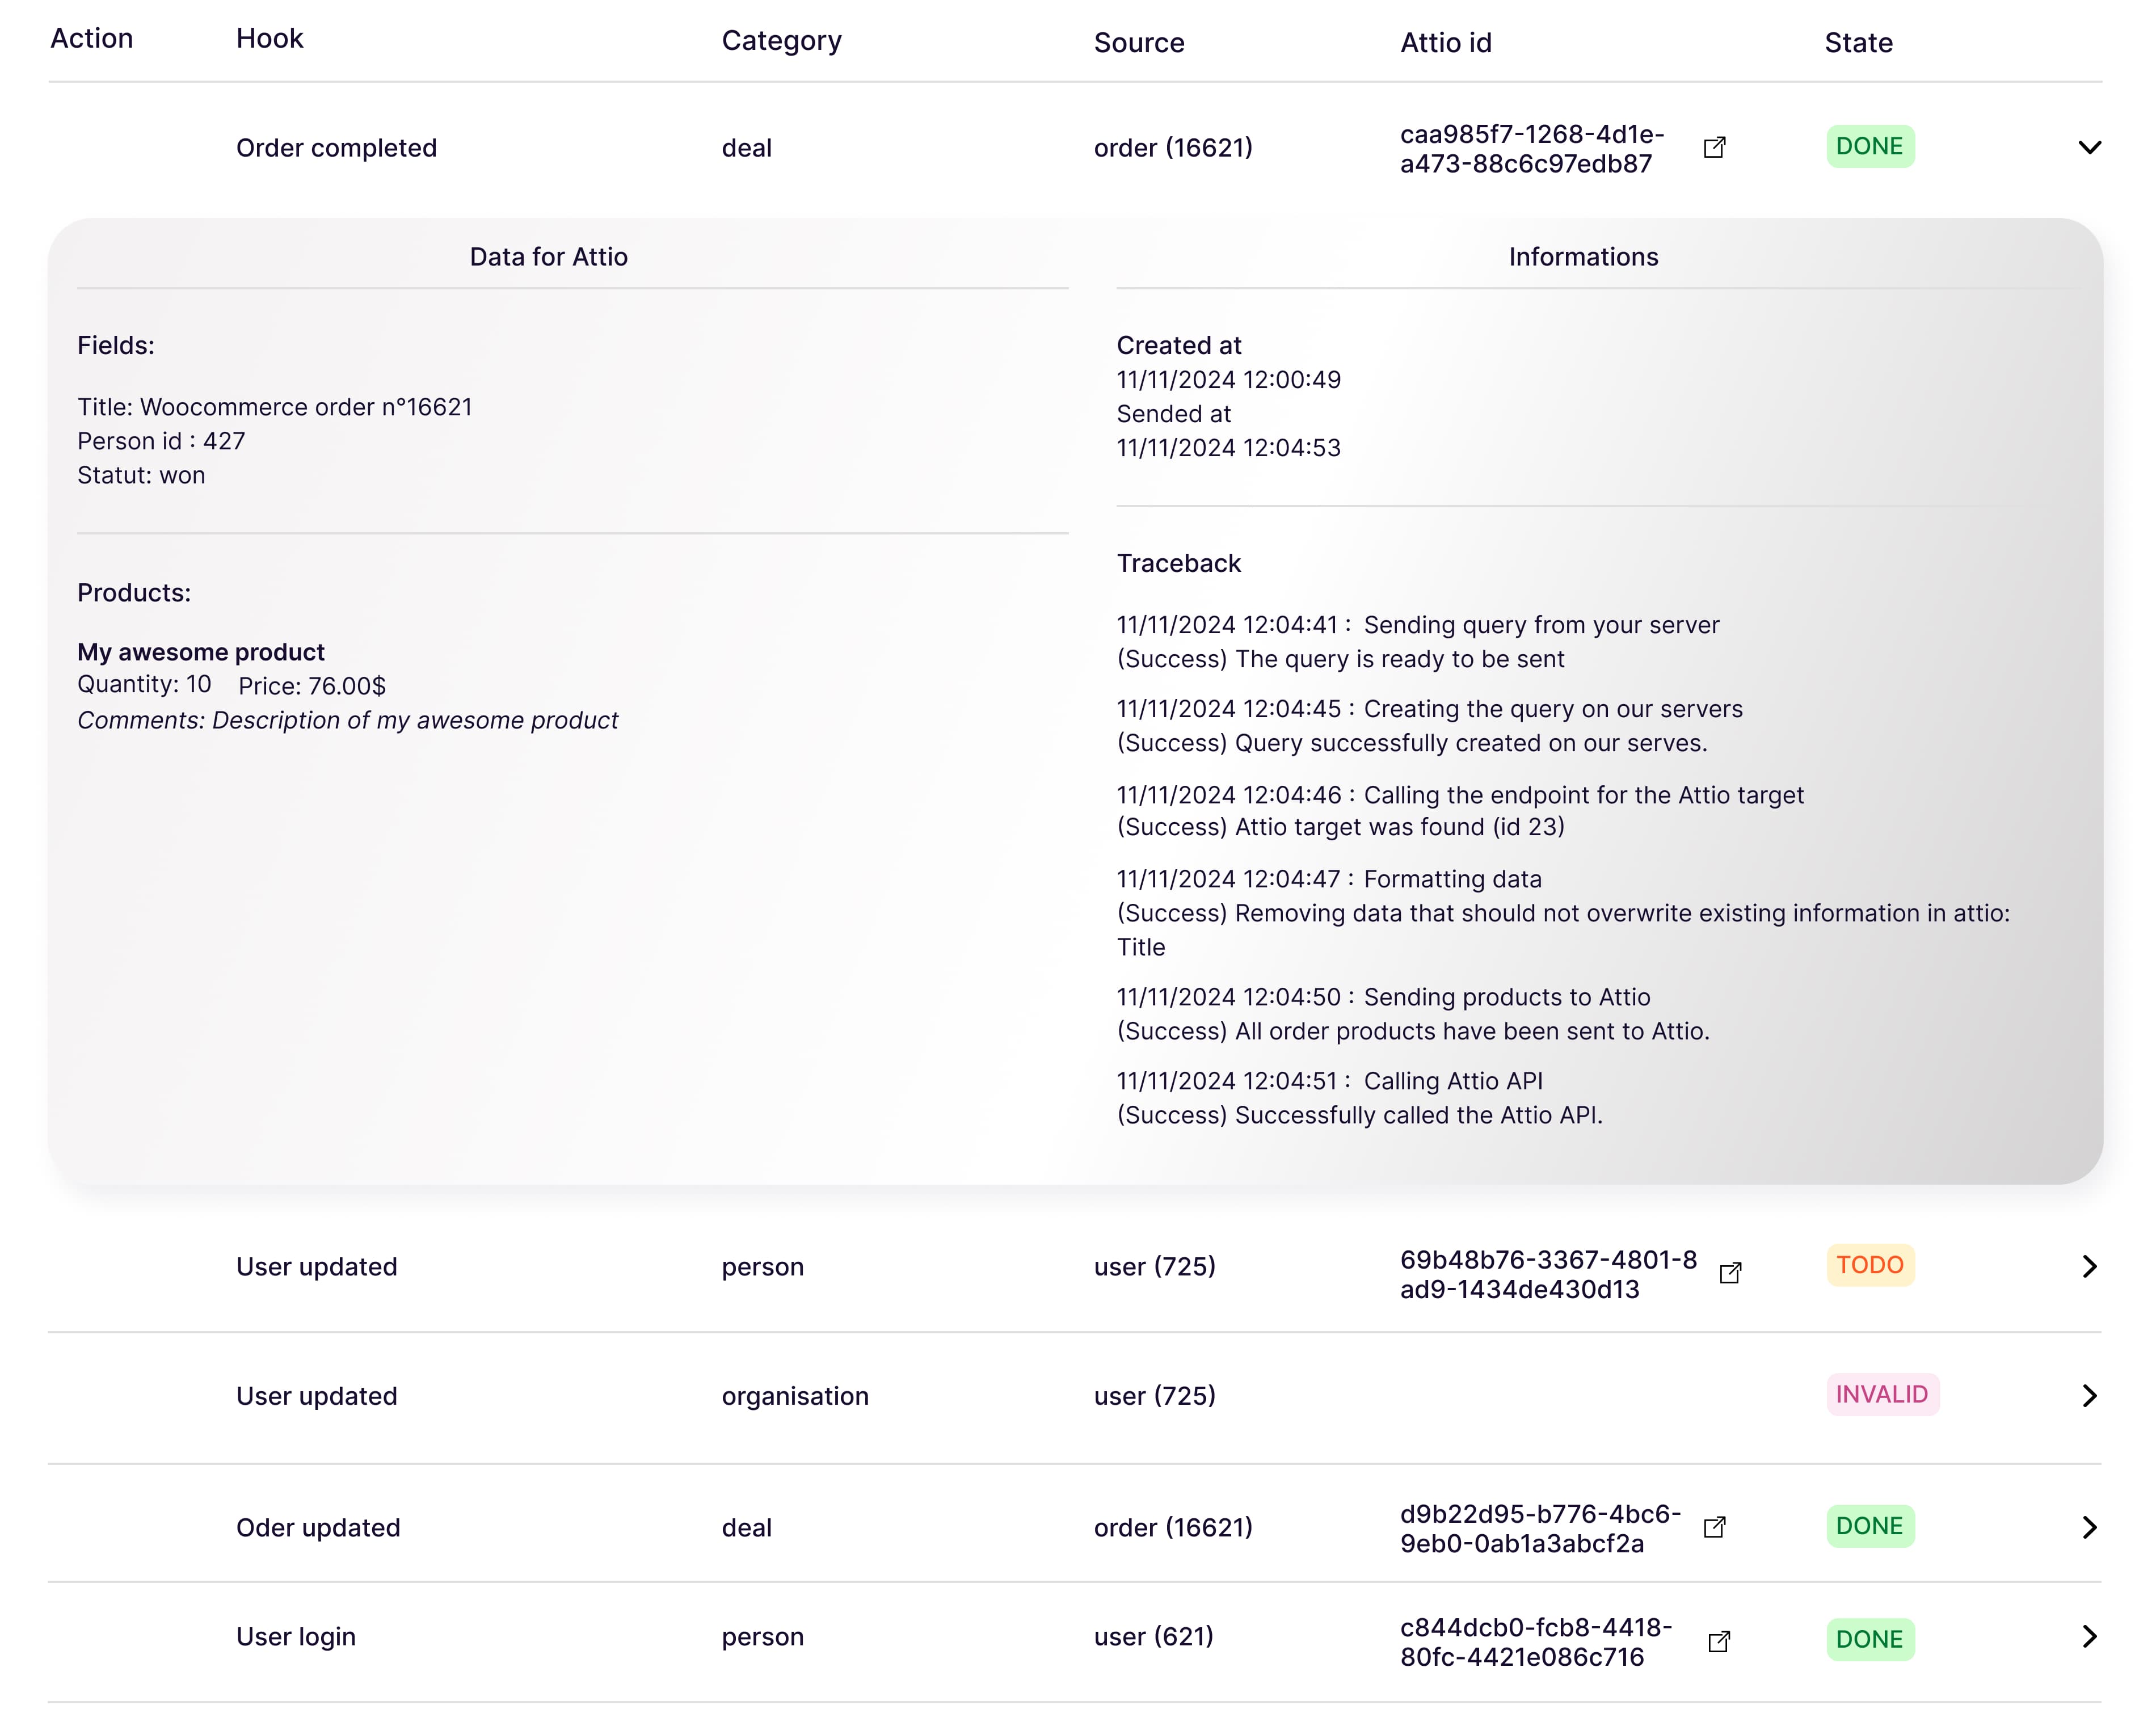
- The History tab logs every event, its source (order, user) and the Attio target record.
- Check it anytime to confirm everything is syncing as expected.
5. Grab a Coffee and Relax

Congratulations! Your W2A setup is complete. Now sit back, grab a coffee, and let W2A handle the heavy lifting. With everything running smoothly in the background, you can focus on what matters most—growing your business.
Need assistance with the setup? We're here to help